


Follow Batteries Plus
How to Convert a Golf Cart to Lithium Batteries
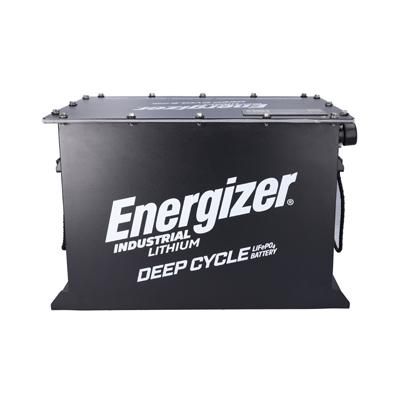
Today, the experts of Batteries Plus are walking through how to install a new Energizer Industrial Lithium 48 Volt deep cycle golf cart battery by converting a cart originally equipped with lead acid batteries.
Disclaimer: While these are the basic steps that could be used for DIY conversion, we highly recommend installation should be performed by experienced personnel to ensure the safe operation of the battery and cart.
Estimated Time
Approximately 1-2 hours
Pro Tip
Golf cart replacement batteries for most brands are available for purchase at your local Batteries Plus. Order online and pick-up in-store and be sure to ask about installation services (available at select stores)!
Tools You'll Need
- Conversion kit
- Cordless drill
- Torque wrench
- Socket wrench with extensions
- Screwdriver along with drive bits (flat, phillips, hex, torx)
- Zip ties and Electrical Tape
- Safety Gear (safety glasses, steel-toed shoes, and gloves)
Step-By-Step Instructions to Convert Golf Carts to Lithium Batteries
Follow these steps to complete your cart conversion and battery swap. If you just need to swap out the batteries, use our How to Install Golf Cart Batteries guide.
If you own an E-Z-Go or Yamaha cart, we also recommend watching our video tutorials:
1. Prepare the Cart
- Begin by engaging the parking brake, and ensuring the vehicle is turned OFF and in TOW mode.
- Position the cart on a flat surface for best results.
- Take a photo of the entire set up prior to the next steps to act as a reference.
2. Remove the Battery Pack
- Start by removing the existing batteries, and preparing the tray area.
- Remove the main negative cable first, then the main positive cable. Proceed to remove the cables from the battery to battery connections.
- Remove the battery hold-down brackets, and carefully remove each battery.
- Clear out any dirt or debris from the battery tray using a vacuum or wipes.
Pro Tip
Use the electrical tape to mark the positive and negative power cables so you know which is which when it's time to reconnect.
3. Drill a Hole
- Using the appropriate drill bit/hole saw, drill out a position on the dash and mount your power button and power gauge.
- Note: The hole needs to be big enough to fit your specific equipment, so the exact size and type of drill bits may vary.
4. Insert the Cables
- String the cable/wiring back to the battery compartment for later connection
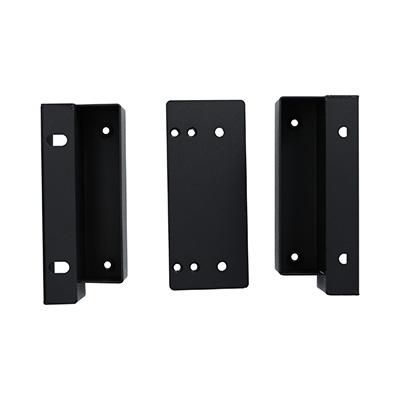
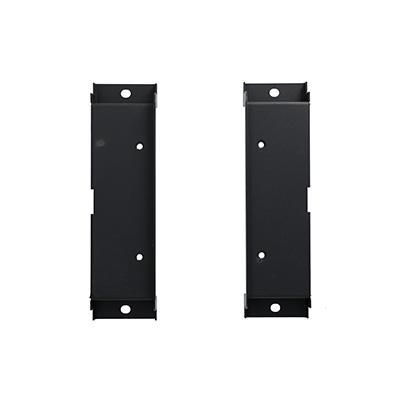
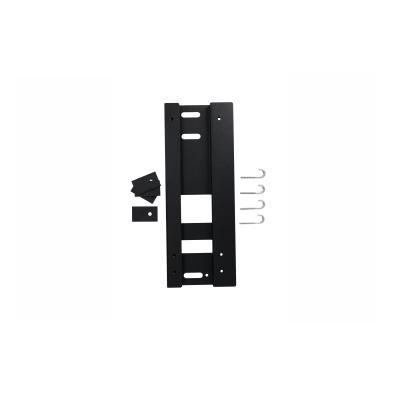
5. Create a Hold Down System
- The new lithium battery will require a different hold down system to be securely mounted in the vehicle. The brackets are designed to fit in the specific area you'll be adding the battery.
Pro Tip
There are four primary bracket types to fit the top carts in the market: EZGO TXT, EZGO RXV, Yamaha, and Club Car (Precedent/Tempo). Ask our experts for the one you need.
6. Install the Battery
- Once the brackets are installed, the battery can be securely mounted in the cart. Ensure all cables and wires are clear and will not be “pinched” when it's time to close up.
Additional Installations:
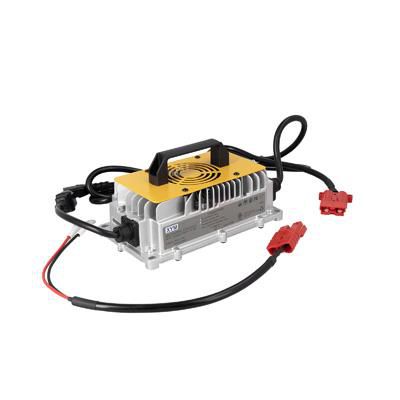
- A lithium-specific charger can be installed in the battery compartment. When choosing an installation location, ensure there is space around the fan to provide sufficient cooling - at minimum 3 inches away from other surfaces. Place it horizontally with fan (handle) facing upwards or vertically with AC/DC cords facing up/down.
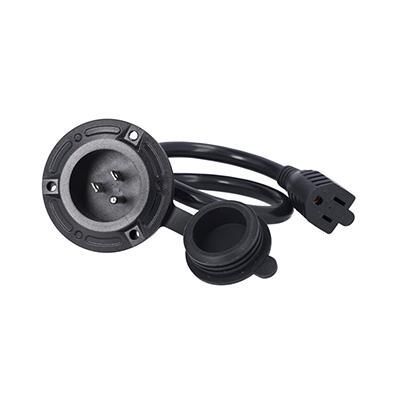
- An AC Charge Port can be mounted on the cart to connect the charger to an AC outlet as well. For some carts, this unit can replace the existing charge port, while others will require a new hole to be drilled. The battery charger will be connected to this unit in the battery compartment, with a grounded power cable connected on the other side for charging.
Conversion Kits for Legacy Golf Carts
The battery is only one part of lithium conversion. Here are the charges, AC charge ports, and cart-specific brackets you'll need to finish the job:
E-Z-Go Conversion Kit

Yamaha Conversion Kit
Club Car Conversion Kit
7. Reassemble and Test
- Make sure the battery is turned OFF.
- Begin connecting your main power cables and battery charger cables to the battery.
- Tighten the connections according to the torque specifications listed on the battery.
- Connect your remote power button cable and battery gauge cable.
8. Power Up and Test
- Power your battery by using the button directly on the battery.
- Thoroughly test out the remote power button on the dash to ensure it is operating correctly. Check the output on the battery gauge and/or using the Battlite App (accessed through the battery gauge).
- After confirming all connections and power, switch your vehicle back to RUN mode, turn it to ON and enjoy the ride!
Ready to Hit the Road Again!
With your new lithium battery installed, your cart is ready to provide the reliable performance and range you depend on. If you ran into any trouble or realized you'd prefer professional guidance, remember that your local Batteries Plus is always here to help. Whether you need expert advice, high-quality replacement parts, or full-service installation (available at select locations), we’re here to help.